The Envato Marketplaces are exploding, with more than 600k members and over 65k files!
A great addition to the marketplaces is the API, which is becoming more popular everyday, thanks to the latest updates! Our awesome marketplace devs are constantly listening to community feedback, and have added some sweet features to the edge release!
Be sure to check out some of the applications available around the web — all powered by the Envato API.
Today, we’ll take a look at the latest API features! Join me after the jump!
What is an API?
An Application Programming Interface (API) is a particular set of rules and specifications that a software program can follow to access and make use of the services and resources provided by another particular software program. It serves as an interface between different software programs and facilitates their interaction, similar to the way the user interface facilitates interaction between humans and computers.
Web API
Web APIs allow for the combination of multiple services into new applications, known as mashups.
When used in the context of web development, an API is typically a defined set of Hypertext Transfer Protocol (HTTP) request messages, along with a definition of the structure of response messages, which is usually in an Extensible Markup Language (XML) or JavaScript Object Notation (JSON) format.
While “Web API” is virtually a synonym for web service, the recent trend has been moving away from Simple Object Access Protocol (SOAP) based services, toward more direct Representational State Transfer (REST) style communications. Web APIs allow for the combination of multiple services into new applications known as mashups.
Are APIs Used Much?
Most developers will know the answer to this question, but for the others, the answer is a resounding YES.
API’s are found everywhere; they’re partcicularly popular in the social networking sector! Most large networks, including Twitter and Facebook, provide APIs to interact with their service.
New API Features
In this tutorial, we are only going to take a look at the new API features. If you want to learn more about the existing API features, be sure to check out Drew’s tutorial on the topic.
Public
item– Details for a single item, specified by the given ID.item-prices– Return available licences and prices for the given item ID.user-items-by-site– Show the number of items an author has for sale on each site. Requires a username, e.g. collis.
Private
verify-purchase– Details of a purchase. Requires a purchase code, e.g. verify-purchase:550e8400-e29b-41d4-a716-446655440000.download-purchase– URL to download purchase. Requires a purchase code, e.g. download-purchase:550e8400-e29b-41d4-a716-446655440000
Requirements
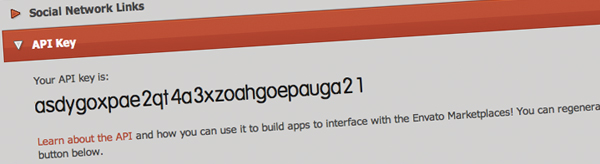
In order to get started with the API, you will need an Envato Marketplace account and an API key.
You can retrieve your API key by visiting your account settings page.
We’ll be using a PHP function, called json_decode; this allows us to retrieve the API data and convert it to an array. This function is included in PHP 5 >= 5.2.0.
Got everything? Let’s get started!
Step 1 - Building our Class
Let’s begin by building a simple PHP class, which will allow us to retrieve data from the API.
Create a new project folder and create another directory called classes, to keep everything organized. Inside this folder, add a new PHP file called envato.api.class.php
First, we’ll construct the basic skeleton of our class:
<?php

/**
* Envato API
*
* An PHP class to interact with the Envato Marketplace API
*
* @author  Philo Hermans
* @copyright Copyright (c) 2011 NETTUTS+
* @link  http://net.tutsplus.com
*/

/**
* envatoAPI
*
* Create our new class called "envatoAPI"
*/
class envatoAPI{

}

?>
Step 2 - Global Variables
We need a couple of variables inside our class to make it flexible. To figure out which variables we need, we have to take a look at the API url formatting.
Public– http://marketplace.envato.com/api/edge/set.jsonPrivate– http://marketplace.envato.com/api/edge/username/api-key/set.json
As you can see, we need a total of four variables:
- API Url
- Set
- Username
- API Key
Let’s create these private variables like so:
class envatoAPI{

 private $api_url = 'http://marketplace.envato.com/api/edge/'; // Default URL
 private $api_set; // This will hold the chosen API set like "user-items-by-site"
 private $username; // The username of the author only needed to access the private sets
 private $api_key; // The api key of the author only needed to access the private sets

}
Step 3 - Setter & Getter Methods
I like to use setter and getter methods when building classes in PHP. So what exactly are these methods? I’ve made a small example below:
$API = new envatoAPI();

$API->api_url = 'http://nettuts.com';
echo $API->api_url ;
The code above will not work and should return the following error:
Fatal error: Cannot access private property envatoAPI::$api_url
Because the variable is set to private, we cannot access or change it. If we need to change the API url without editing the class file, we could do something along the lines of:
$API = new envatoAPI();

$API->set_api_url('http://nettuts.com');
echo $API->get_api_url();
Now switch back to the PHP class and add the function, set_api_url.
/**
* set_api_url()
*
* Set the API URL
*
* @access public
* @param string
* @return   void
*/
public function set_api_url($url)
{
   $this->api_url = $url;
}
Since this function is within our class, we can access and change the private api_url variable. Now in this tutorial, we don’t really need getters, but let’s still create one to provide you with a better understanding of the concept.
/**
* get_api_url()
*
* Return the API URL
*
* @access public
* @return   string
*/
public function get_api_url()
{
   return $this->api_url;
}
As you may have inferred at this point, we don’t need a get function for the API key for example. This makes our class more secure.
Step 4 - Completing the Rest of the Setters
We already finished a setter, so there are three remaining and all of them have the same structure.
Set Username
/**
* set_username()
*
* Set the Username
*
* @access public
* @param string
* @return   void
*/
public function set_username($username)
{
   $this->username = $username;
}
Set API Key
/**
* set_api_key()
*
* Set the API key
*
* @access public
* @param string
* @return   void
*/
public function set_api_key($api_key)
{
   $this->api_key = $api_key;
}
Set API Set
/**
* set_api_set()
*
* Set the API set
*
* @access public
* @param string
* @return   void
*/
public function set_api_set($api_set)
{
   $this->api_set = $api_set;
}
We are now able to set all variables like so:
<?php

include('classes/envato.api.class.php');

$API = new envatoAPI();

// $API->set_api_url();  - We don't need to change the API URL
// $API->set_api_key('ahdio270410ayap20hkdooxaadht5s'); - We only need to set the API key to fetch data from the private set
//$API->set_username('JohnDoe'); // - We only need to set the Envato Marketplace Username to fetch data from the private set
$API->set_api_set('popular:codecanyon'); // Set the API set to request

?>
Step 4 - Request Data
Let’s build a function that will request the data from the Envato Marketplace API. We begin by creating a new public function called request.
/**
* request()
*
* Request data from the API
*
* @access public
* @param void
* @return   array
*/
public function request()
{
}
We can use the same technique used in the previous tutorial. To request the data from the API, we can use cURL. Let’s start of by building the API URL — if the username and API key are set, we require a different url.
if(!empty($this->username) && !empty($this->api_key))
{
   // Build the private url
   $this->api_url .= $this->username . '/'.$this->api_key.'/'.$this->api_set . '.json'; // Sample: http://marketplace.envato.com/api/edge/JohnDoe/ahdio270410ayap20hkdooxaadht5s/popular:codecanyon.json
}
else
{
   // Build the public url
   $this->api_url .=  $this->api_set . '.json'; // Sample: http://marketplace.envato.com/api/edge/popular:codecanyon.json
}
We send a request to the API using cURL like so:
$ch = curl_init($this->api_url); // Initialize a cURL session & set the API URL
curl_setopt($ch, CURLOPT_CONNECTTIMEOUT, 5); //The number of seconds to wait while trying to connect
curl_setopt($ch, CURLOPT_RETURNTRANSFER, true); // Return the transfer as a string instead of outputting it out directly.
$ch_data = curl_exec($ch); // Perform a cURL session
curl_close($ch);  //Close a cURL session
We now have a variable, called $ch_data which contains a JSON formatted string. Before we can do something with this, we need to decode it into a array.
// Check if the variable contains data
if(!empty($ch_data))
{
   return json_decode($ch_data, true); // Decode the requested data into an array
}
else
{
   return('We are unable to retrieve any information from the API.'); // Return error message
}
The function in its entirety looks like so:
public function request()
{

   if(!empty($this->username) && !empty($this->api_key))
   {
    // Build the private url
    $this->api_url .= $this->username . '/'.$this->api_key.'/'.$this->api_set . '.json';
   }
   else
   {
    // Build the public url
    $this->api_url .=  $this->api_set . '.json';
   }

   $ch = curl_init($this->api_url); // Initialize a cURL session & set the API URL
   curl_setopt($ch, CURLOPT_CONNECTTIMEOUT, 5); //The number of seconds to wait while trying to connect
   curl_setopt($ch, CURLOPT_RETURNTRANSFER, true); // Return the transfer as a string instead of outputting it out directly.
   $ch_data = curl_exec($ch); // Perform a cURL session
   curl_close($ch);  //Close a cURL session

   // Check if the variable contains data
   if(!empty($ch_data))
   {
    return json_decode($ch_data, true); // Decode the requested data into an array
   }
   else
   {
    return('We are unable to retrieve any information from the API.'); // Return error message
   }

}
Step 5 - Testing the Function
Let’s try our class and request some data from the API:
<?php
include('classes/envato.api.class.php');

$API = new envatoAPI();

//$API->set_api_url();
//$API->set_api_key('ahdio270410ayap20hkdooxaadht5s');
//$API->set_username('JohnDoe'); // Envato username
$API->set_api_set('popular:codecanyon'); // Set the API set to request

echo '<pre>';
print_r( $API->request() );
echo '</pre>';
?>
Step 6 - Testing out the New Features of the Public API
Now that our class is working, it is time to build some examples with the new API features.
Item
To request information about a marketplace item, we must supply the API with an item ID. You can find the item ID within the URL of the marketplace item.
Now that we have our ID, let’s request the item information:
<?php

include('classes/envato.api.class.php');

$API = new envatoAPI();
$API->set_api_set('item:147510'); // Set the API set to request

echo '<pre>';
print_r( $API->request() );
echo '</pre>';
?>
The following data should be returned:
Array
(
   [item] => Array
       (
           [sales] => 16
           [rating] => 5
           [cost] => 25.00
           [user] => Philo01
           [uploaded_on] => Tue Dec 21 03:13:24 +1100 2010
           [url] => http://codecanyon.net/item/wordpress-car-dealer/147510
           [live_preview_url] => http://s3.envato.com/files/1410781/1_preview.__large_preview.jpg
           [thumbnail] => http://s3.envato.com/files/1410780/Car_dealer_avatar.jpg
           [tags] => easy to use, easy to setup, car inventory, car dealer, dealership, 2 build in sliders, native post type & taxonomies, over 35 settings, list all your cars, inventory system
           [id] => 147510
           [item] => WordPress Car Dealer
       )

)
Now let’s build a simple page that will display the information above in a way that other users will understand it. First, we need to assign the API data to a variable:
$API = new envatoAPI();
$API->set_api_set('item:147510'); // Set the API set to request

$data = $API->request();
We can now display data from the API in the following format: $data['item']['key'].
<?php

include('classes/envato.api.class.php');

$API = new envatoAPI();
$API->set_api_set('item:147510'); // Set the API set to request

$data = $API->request();

?>

<h2><a href="<?php echo $data['item']['url']; ?>"><?php echo $data['item']['item']; ?></a></h2>
<img src="<?php echo $data['item']['live_preview_url']; ?>" alt="" />
<p>By <?php echo $data['item']['user']; ?>, available for only <?php echo $data['item']['cost']; ?>!</p>
The HTML after the PHP is parsed:
<h2><a href="http://codecanyon.net/item/wordpress-car-dealer/147510">WordPress Car Dealer</a></h2>
<img src="http://s3.envato.com/files/1410781/1_preview.__large_preview.jpg" alt="" />
<p>By Philo01, available for only 25.00!</p>

item-prices
Instead of creating a new API request to find out more about the item price and license, we can simply add it to the current API set.
$API = new envatoAPI();
$API->set_api_set('item:147510+item-prices:147510'); // Set the API set to request

$data = $API->request();
The API’s response is below:
[item-prices] => Array
   (
       [0] => Array
           (
               [licence] => Regular Licence
               [price] => 25.00
           )

       [1] => Array
           (
               [licence] => Extended License
               [price] => 175.00
           )

   )
Now we can use this returned information in our item page.
<h2><a href="<?php echo $data['item']['url']; ?>"><?php echo $data['item']['item']; ?></a></h2>
<img src="<?php echo $data['item']['live_preview_url']; ?>" alt="" />
<p>By <?php echo $data['item']['user']; ?></p>

<p><strong>Pricing:</strong></p>
<ul>
 <?php
 // Loop trough all the licenses & prices
 foreach( $data['item-prices'] as $p)
 {
  echo '<li>' . $p['licence'] . ' - ${body}#39; . $p['price'] . '</li>';
 }
 ?>
</ul>

user-items-by-site
To finish it off, we are going to append the number of items the user has. We can simply add it to the API set.
$API->set_api_set('item:147510+item-prices:147510+user-items-by-site:Philo01');
And the response:
[user-items-by-site] => Array
   (
       [0] => Array
           (
               [site] => ThemeForest
               [items] => 1
           )

       [1] => Array
           (
               [site] => CodeCanyon
               [items] => 5
           )

   )
Let’s add this information to our page.
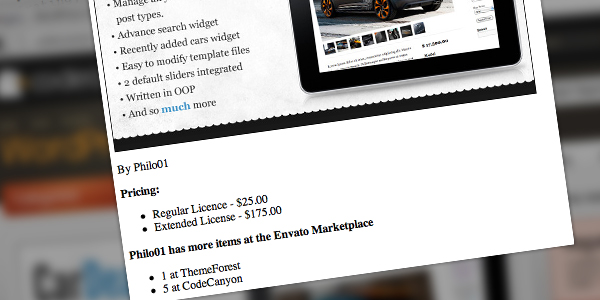
<h2><a href="<?php echo $data['item']['url']; ?>"><?php echo $data['item']['item']; ?></a></h2>
<img src="<?php echo $data['item']['live_preview_url']; ?>" alt="" />
<p>By <?php echo $data['item']['user']; ?></p>

<p><strong>Pricing:</strong></p>
<ul>
 <?php
 // Loop trough all the licenses & prices
 foreach( $data['item-prices'] as $p)
 {
  echo '<li>' . $p['licence'] . ' - ${body}#39; . $p['price'] . '</li>';
 }
 ?>
</ul>

<p><strong><?php echo $data['item']['user']; ?> has more items at the Envato Marketplace</strong></p>
<ul>
 <?php
 // Loop trough all the marketplaces
 foreach( $data['user-items-by-site'] as $p)
 {
  echo '<li>' . $p['items'] . ' at ' . $p['site'] . '</li>';
 }
 ?>
</ul>
Step 7 – Testing the New Features of the Private API
In order to use the private API features, you will need a marketplace account and a purchase code from one of your customers. We first need to define this information.
$API->set_api_key('ahdio270410ayap20hkdooxaadht5s');
$API->set_username('JohnDoe');
verify-purchase
This will automatically change the API URL from public to the private set. To make things a bit more dynamic, we can create a little form where the user can enter some information to verify his purchase.
Note: When building your own website, don’t use inline styles like this!
<style>
form{
 background: #f8f8f8;
 width: 300px;
 border: 1px solid #e2e2e2;
}
form fieldset{
 border: 0;
}
form label{
 display: block;
 padding: 3px;
}
form input[type=text]{
 padding: 3px;
 border: 1px solid #d7d7d7;
}
</style>

<h2>Verify Purchase</h2>

<form action="" method="post">
 <fieldset>
  <p><label>Marketplace Username:</label>
  <input type="text" name="username" value="" /></p>

  <p><label>Item ID:</label>
  <input type="text" name="item_id" value="" /></p>

  <p><label>Purchase code:</label>
  <input type="text" name="purchase_code" value="" /></p>

  <p><input type="submit" name="submit" value="Verify" /></p>
 </fieldset>
</form>
This gives us a basic form like so:
Now let’s get to the PHP part.
First, we need to check whether the form has been submitted with the requisite fields filled. If you are using this on a live website, remember to add more validation to make things more secure.
if(isset($_POST['submit']))
{

 // Assign data to variables
 $username = $_POST['username'];
 $item_id = $_POST['item_id'];
 $purchase_code = $_POST['purchase_code'];

 // Check if all fields are filled in
 if(!empty($username) && !empty($item_id) && !empty($purchase_code))
 {
  // API Request
 }
}
And now the API request.
if(isset($_POST['submit']))
{

 // Assign data to variables
 $username = $_POST['username'];
 $item_id = $_POST['item_id'];
 $purchase_code = $_POST['purchase_code'];

 // Check if all fields are filled in
 if(!empty($username) && !empty($item_id) && !empty($purchase_code))
 {
  $API = new envatoAPI();
  $API->set_api_key('ahdio270410ayap20hkdooxaadht5s');
  $API->set_username('JohnDoe');
  $API->set_api_set('verify-purchase:' . $purchase_code);

  $data = $API->request();
 }
}
A valid API response will look like so:
Array
(
   [verify-purchase] => Array
       (
           [licence] => Regular Licence
           [item_id] => 147510
           [buyer] => EnvatoDemo
           [created_at] => Thu Dec 31 08:28:03 +1100 2009
           [item_name] => WordPress Car Dealer
       )

)
If the request is invalid, the API will return an empty array. If we get a response from the API, it means that the purchase code is correct. In the interest of making it more secure, we’ll match it to the entered item id and username.
if(isset($_POST['submit']))
{

 // Assign data to variables
 $username = $_POST['username'];
 $item_id = $_POST['item_id'];
 $purchase_code = $_POST['purchase_code'];

 // Check if all fields are filled in
 if(!empty($username) && !empty($item_id) && !empty($purchase_code))
 {
  $API = new envatoAPI();
  $API->set_api_key('ahdio270410ayap20hkdooxaadht5s');
  $API->set_username('JohnDoe');
  $API->set_api_set('verify-purchase:' . $purchase_code);

  $data = $API->request();

  if(!empty($data))
  {
   // We got a valid API response let's match the item id and the username
   if($data['verify-purchase']['item_id'] == $item_id && $data['verify-purchase']['buyer'] == $username)
   {
    // Everything seems to be correct! Purchase verified!
    // Show some info like purchase date and licence
    echo '<p>You have purchased the item on ' . $data['verify-purchase']['created_at'] . ' with the ' . $data['verify-purchase']['licence'] . '!</p>';
   }

  }
  else{
   // Response from the API was empty, return error
   echo '<p>Sorry, we are unable to verify your purchase.</p>';
  }

 }
}
download-purchase
The download-purchase set allows you to download your own purchases without visiting the marketplace.
Note: The download purchase only works when you are using your own API key and a purchase code of a product that you’ve purchased.
<form action="" method="post">
 <fieldset>
  <p><label>Marketplace Username:</label>
  <input type="text" name="username" value="" /></p>

  <p><label>Item ID:</label>
  <input type="text" name="item_id" value="" /></p>

  <p><label>Purchase code:</label>
  <input type="text" name="purchase_code" value="" /></p>

  <p><input type="checkbox" name="download" value="1" /> Download Item</p>

  <p><input type="submit" name="submit"  value="Verify" /></p>
 </fieldset>
</form>
Now that we have our checkbox, let’s make some changes to the verification process.
We’ll begin by creating a new variable.
// Assign data to variables
$username = $_POST['username'];
$item_id = $_POST['item_id'];
$purchase_code = $_POST['purchase_code'];
$download = (isset($_POST['download'])) ? $_POST['download'] : '';
We also need to make some changes to the remaining code:
if(isset($_POST['submit']))
{

 // Assign data to variables
 $username = $_POST['username'];
 $item_id = $_POST['item_id'];
 $purchase_code = $_POST['purchase_code'];
 $download = (isset($_POST['download'])) ? $_POST['download'] : '';

 // Check if all fields are filled in
 if(!empty($username) && !empty($item_id) && !empty($purchase_code))
 {
  $API = new envatoAPI();
  $API->set_api_key('ahdio270410ayap20hkdooxaadht5s');
  $API->set_username('JohnDoe');

  // If download is checked request the download-purchase set
  if(!empty($download))
  {
   $API->set_api_set('download-purchase:' . $purchase_code);
   $data = $API->request();

   // Set the header location to the download URL provided by the API
   header("Location: " . $data['download-purchase']['download_url']);
  }
  else
  {

   // The download checkbox was not checked so verify the purchase
   $API->set_api_set('verify-purchase:' . $purchase_code);
   $data = $API->request();

   if(!empty($data))
   {
    // We got a valid API response let's match the item id and the username
    if($data['verify-purchase']['item_id'] == $item_id && $data['verify-purchase']['buyer'] == $username)
    {

     // Everything seems to be correct! Purchase verified!
      // Show some info like purchase date and licence
      echo '<p>You have purchased the item on ' . $data['verify-purchase']['created_at'] . ' with the ' . $data['verify-purchase']['licence'] . '!</p>';
    }

   }
   else
   {
    // Response from the API was empty, return error
    echo '<p>Sorry, we are unable to verify your purchase.</p>';
   }
  }

 }
}
With those changes in place, the response should look like so:
Array
(
   [download-purchase] => Array
       (
           [download_url] => http://download/ourfile.zip?AWSAccessKeyId=12345&Expires=6789&Signature=HAoYF962%53faf
       )

)
Conclusion
I hope you’ve learned a bit about Envato’s marketplace API. If so, then put this knowledge to use and build some sweet applications! Thank you so much for reading, and let us know if you have any questions or concerns.